DIY plumbing can potentially save both time and money on simple repairs and help prevent minor issues from escalating into larger problems. However, the effectiveness of a DIY approach depends on the complexity of the issue and your level of skill. For intricate tasks—such as major leaks or complicated water heater malfunctions—it is best to rely on professional help.
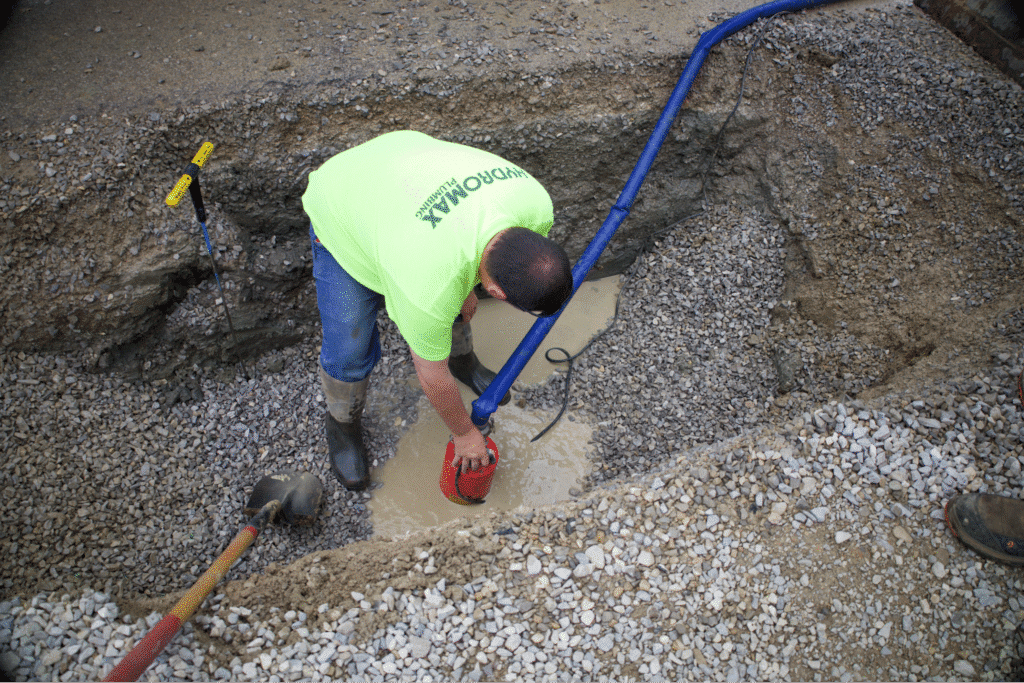
In Evansville, Indiana, reliable expertise is available from Hydromax Plumbing, a company well-equipped to handle advanced repairs with innovative solutions such as Trenchless Pipe Repair that minimize digging and disruption. If you encounter urgent plumbing issues, their Emergency Plumbing services provide fast solutions any time of day. Let’s explore ten practical DIY plumbing tips that make routine maintenance both accessible and effective.
Essential Tools for DIY Plumbing
Before starting any repair, make sure you have these basic tools on hand:
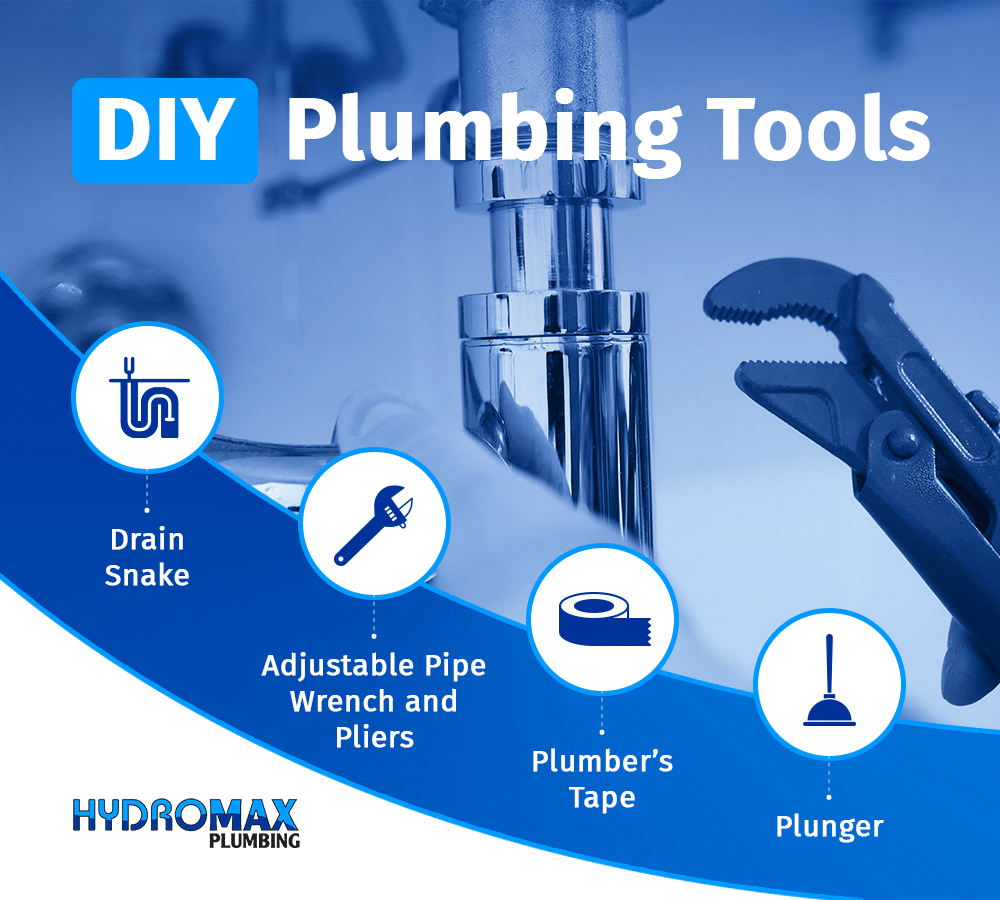

- Plunger: Helps clear minor clogs without the need for harsh chemicals.
- Adjustable Pipe Wrench and Pliers: Useful for loosening or tightening plumbing fittings.
- Plumber’s Tape: Creates a watertight seal on threaded joints.
- Drain Snake: A flexible tool designed to dislodge stubborn blockages.
Having these tools ready can help you address issues quickly and avoid unnecessary damage.
1. How to Unclog a Toilet
Before You Start: Turn off the water supply valve behind the toilet and put down towels. If the bowl is too full, scoop some water out.
Methods:
- Plunger: Use a toilet plunger (with a flange) to create a tight seal over the drain. Pump firmly 15-20 times, then break the seal. Repeat if needed.
- Hot Water & Dish Soap: Pour hot (not boiling) water into the bowl, add dish soap, and let sit for 10-15 minutes. This can help loosen clogs.
- Baking Soda & Vinegar: Pour 1 cup baking soda, then 1 cup vinegar into the bowl. Let it sit for several hours before flushing or plunging. Less effective for solid clogs.
- Toilet Auger: If plunging fails, use a toilet auger (snake). Insert it, crank the handle to bore through the clog, and pull it out.
- Chemical Cleaners: Use as a last resort, following product instructions carefully.
If these don’t work or water backs up elsewhere, call a plumber for clogged toilet services.
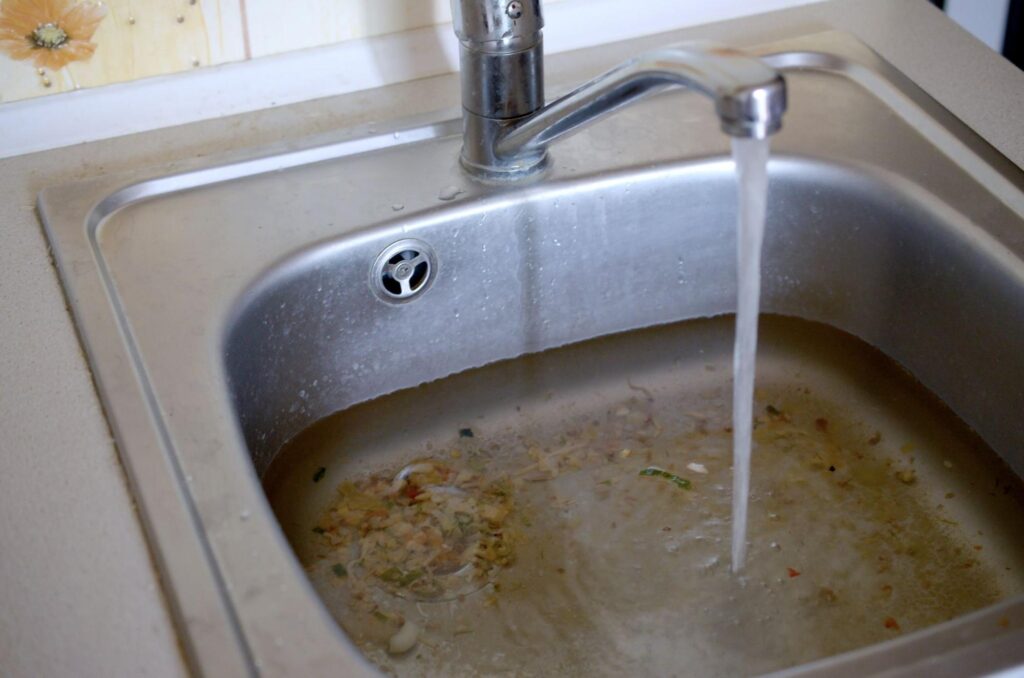
2. How to Unclog a Drain
Kitchen and bathroom drains often become blocked over time. Try these steps:
- Slowly pour a kettle of hot water into the drain to help dissolve grease and soap buildup.
- Follow up by pouring one cup of baking soda, then one cup of vinegar into the drain. Allow it to fizz for about 15 minutes, then flush again with hot water.
- For a different approach, try using half a cup of table salt down the drain followed by hot water. Let sit for a few minutes before flushing with more hot water. Another variation is combining baking soda and salt.
- If the clog persists, use a plunger or a drain snake to manually break it up.
- Chemical drain cleaners are an option for stubborn clogs, but use them with caution and follow the manufacturer’s instructions carefully. Enzyme-based cleaners are considered a greener option as they use natural bacteria and enzymes to break down organic matter. Avoid mixing different chemical cleaners, as this can create dangerous fumes.
If you experience recurring clogs, it might indicate a deeper problem. In such cases, consider professional Drain Cleaning to avoid long-term damage.
3. Fixing a Leaky Faucet
A dripping faucet not only wastes water; it can also contribute to higher utility bills. To fix it:
- Shut off the water supply. Locate the hot and cold water supply valves, usually found under the sink, and turn them clockwise to stop the water flow. If there are no individual shutoff valves, you may need to turn off the main water supply to your house.
- Turn on the faucet to drain any residual water in the pipes.
- Plug the drain to prevent small parts from falling into it.
- Identifying Your Faucet Type:Before starting the repair, it’s crucial to identify the type of faucet you have, as the internal mechanisms and repair steps vary. The four main types are:
- Compression Faucets: These are typically found in older homes and have separate handles for hot and cold water. Leaks often occur due to worn-out washers or O-rings.
- Cartridge Faucets: These can have either a single handle that moves up and down for flow and side-to-side for temperature, or two handles.Leaks usually stem from a worn-out cartridge.
- Ball Faucets: These single-handle faucets have a ball bearing to control water flow and temperature. Leaks often result from worn O-rings or seals.
- Ceramic Disk Faucets: Known for their durability, these typically single-handle faucets use ceramic disks to control water flow. Leaks can happen if the ceramic disks are damaged or if sediment builds up.
Compression Faucet Repair:
Remove handle, packing nut, and stem. Replace the washer and O-ring on the stem. Clean or replace the valve seat if needed.
Cartridge Faucet Repair:
Remove handle and retaining clip/nut. Pull out the cartridge. Replace O-rings or the entire cartridge.
Ball Faucet Repair:
Remove handle, cap, and collar. Remove cam, washer, ball, seals, and springs. Replace worn O-rings, seals, and springs.
Ceramic Disk Faucet Repair:
Remove handle, cap, and cylinder. Clean or replace seals or the cylinder.
If the leak continues after a repair, it may be time to consult a professional plumber.
4. Solutions for a Running Toilet
A running toilet usually means water is leaking from the tank into the bowl, often caused by one of these problems:
- Leaking Flapper: The rubber or plastic stopper at the bottom of the tank isn’t sealing properly.
- Solution: Check if the flapper is worn, warped, or dirty. Clean it or replace it. Ensure the chain to the flush lever has slight slack (about 1/2 inch). Test for a flapper leak by adding food coloring to the tank; if color appears in the bowl, the flapper is leaking.
- Faulty Fill Valve (Ballcock): The valve that refills the tank isn’t shutting off correctly.
- Solution: Adjust the float (ball or cylinder) so the water level is about an inch below the overflow tube. If cleaning or adjusting doesn’t work, replace the fill valve.
- Incorrect Refill Tube Position: The small tube running from the fill valve into the overflow pipe is set too low.
- Solution: Make sure the refill tube is clipped above the water line inside the overflow pipe, not inserted too far down. Trim it if necessary.
- Sticking Flush Lever: The handle is getting stuck, keeping the flapper open slightly.
- Solution: Jiggle the handle to free it. Check for obstructions. Lubricate or replace the lever if it keeps sticking.
Should the problem persist despite these fixes, professional evaluation is recommended.
5. Tips to Silence Noisy Pipes
Noisy pipes might be more than just an annoyance—they can indicate stress within your plumbing system. Some issues to address include:
- Water Hammer (Banging): Caused by sudden water stops. Replenish air in air chambers by draining and refilling the system, or install water hammer arrestors near problematic fixtures.
- Loose Pipes (Rattling/Vibrating): Pipes hitting nearby surfaces. Secure loose pipes with straps/hangers. Add cushioning (like foam) where pipes touch framing.
- High Water Pressure (Humming/Whistling): Water flowing too fast. Check pressure (should be 40-60 PSI). Adjust or install a pressure-reducing valve (PRV).
- Expanding Hot Water Pipes (Creaking/Rubbing): Hot pipes expanding against surfaces. Insulate hot water pipes. Lower your water heater temperature.
- Worn Washers/Valves (Whistling/Squealing): Faulty parts in faucets or fixtures. Identify and replace the worn washer or valve.
- Sediment Buildup (Gurgling/Hissing): Mineral deposits restricting flow. Minor flushing might help. For significant buildup, professional cleaning or a water softener may be needed.
Persistent noise might suggest a deeper issue, so professional diagnosis could be necessary.
6. DIY Fixes for Low Water Pressure
Low water pressure can often be fixed with these steps:
- Check Main Water Valves: Ensure both your house’s main shut-off valve and the water meter valve are fully open.
- Inspect Pressure Regulator (PRV): If you have a PRV, check if it’s faulty or set too low. You can try adjusting it slightly, but significant issues may need a plumber. Using a pressure gauge can help diagnose.
- Clean Clogged Fixtures: Mineral buildup in faucet aerators and showerheads is common. Unscrew and soak them in white vinegar to remove deposits.
- Look for Leaks: Check for visible leaks around pipes. Even small ones reduce pressure. A water meter check can help find hidden leaks.
- Troubleshoot Hot Water: If only hot water has low pressure, check the water heater valve, sediment in the tank, or clogged hot water lines.
- Consider Pipe Condition: In older homes, corroded or blocked pipes (especially galvanized steel) can reduce flow and may need professional cleaning or replacement.
- Check with Neighbors/Utility: If the problem is widespread and sudden, the issue might be with the municipal supply.
If low pressure continues, it may be wise to consult a professional.
7. Handling Small Pipe Leaks
A small pipe leak, if not addressed quickly, can lead to significant water damage. While a plumber is needed for a permanent fix, several temporary DIY solutions can help contain the leak until professional help arrives.
Here’s how to handle small pipe leaks:
- Shut Off the Water. The most crucial first step is to immediately turn off the water supply to the affected pipe or your entire home to stop the flow and prevent further damage.
- Identify and Prepare the Area. Locate the exact source of the leak. Clean and dry the area around the leak thoroughly with a cloth. If the leak is near electrical components, turn off the power to that area for safety.
- Apply a Temporary Fix. Choose a method based on the size of the leak and available materials. These are temporary solutions, not permanent repairs.
- Pipe Repair Tape / Silicone Tape: This self-fusing tape stretches and bonds to itself, creating a watertight seal when wrapped tightly around the leak. Overlap the tape layers for a secure fit. Some types work best on certain pipe materials or pressure levels.
- Epoxy Putty: This two-part moldable putty hardens to create a seal over small holes or cracks. Knead the putty until the colors are uniform to activate it, then press it firmly over the leak, extending slightly beyond it. Ensure the pipe is dry for proper adhesion.
- Rubber Patch and Clamp: For slightly larger leaks, cut a piece of rubber (like from an old inner tube or garden hose) larger than the leak. Place the rubber patch over the leak and secure it tightly with a pipe clamp (like a hose clamp or specialized repair clamp). Tighten the clamp evenly to compress the rubber against the pipe without overtightening.
- Duct Tape: While not as effective or long-lasting as other methods, wrapping several layers of duct tape tightly around a small leak can offer a very short-term fix.
- Test and Monitor. Once the temporary repair is in place, slowly turn the water supply back on and check if the leak has stopped. Continue to monitor the repair closely as it is only a temporary solution.
Remember that these methods are intended to stop or slow the leak temporarily to prevent damage while you arrange for a qualified plumber to make a permanent repair. Leaving a temporary fix in place can lead to more significant damage later.
For persistent or larger leaks, consider professional methods like pipe lining for a more durable solution.
8. Preventing Drain Odors
Unpleasant smells from your drains often arise from dried-out traps or buildup inside the pipes. To prevent odors:
- Use Drain Strainers: Place strainers over drain openings in sinks, showers, and tubs to catch food debris, hair, and soap scum before they go down the drain.
- Be Mindful of What Goes Down the Drain: Avoid pouring fats, oils, grease (FOG), coffee grounds, and large food scraps down kitchen drains, as these are major contributors to clogs and odors.
- Regularly Flush with Hot Water: Pouring hot or boiling water down drains periodically can help melt and flush away minor buildup of grease and other residues before they cause odors. Be cautious with boiling water if you have PVC pipes, as it can potentially damage them.
- Use Baking Soda and Vinegar: This natural method can help clean drains and neutralize odors.
- Pour about ½ to 1 cup of baking soda down the drain.
- Follow with about 1 cup of white vinegar.
- The mixture will fizz; let it sit for at least 15-30 minutes, or longer.
- Flush thoroughly with hot water. This reaction can help break down grime and loosen minor clogs.
- Keep P-Traps Wet: For drains that aren’t used frequently (like in guest bathrooms or utility sinks), the water in the P-trap can evaporate, allowing sewer gas to escape.
- Run water down these drains for about 10-15 seconds regularly (every few weeks or months) to refill the trap.
- For long-term disuse, you can add a small amount of mineral oil or cooking oil after running water; it floats on top and slows evaporation. Avoid using automotive antifreeze, as it is toxic.
- Consider a drain plug for infrequently used drains like shower drains to slow evaporation.
- Clean the Overflow: The overflow drain in sinks can also collect soap scum and debris, leading to odors. You can clean it by pouring a vinegar solution or bleach down the overflow hole.
- Consider Enzyme Cleaners: These cleaners use natural bacteria and enzymes to break down organic material causing odors and buildup.They are best used as a preventative measure rather than for clearing active clogs.
If unpleasant odors continue, it might indicate a deeper plumbing problem that needs professional attention.
9. Troubleshooting Water Heater Problems
When your water heater malfunctions, it can disrupt your daily routine.
Before you start: Turn off power (electric) or gas (gas) to the unit for safety.
- No/Not Enough Hot Water:
- Electric: Check tripped breaker, reset button, thermostats, heating elements.
- Gas: Check pilot light (relight if needed), gas supply valve, thermocouple, gas control valve.
- Water Too Hot or Cold: Adjust thermostat setting. Could be a faulty thermostat or element.
- Strange Noises:
- Popping/Rumbling: Sediment buildup (flush the tank).
- Hissing/Crackling: Water on hot surface.
- Humming: Loose element.
- Leaking Water: Identify Source: Top (connections), Side (T&P valve), Bottom (drain valve or tank crack – usually requires replacement). Tighten loose connections. If T&P valve leaks, it may need replacement. A leaking tank requires a new heater.
- Smelly Hot Water (Sulfur/Egg): Usually bacteria in the tank. Temporarily increase temperature, flush tank, or consider professional sanitization/anode rod replacement.
When to Call a Plumber: For gas leaks (immediate), tank leaks, if you’re uncomfortable with electrical/gas work, complex issues, or if DIY fixes fail. Regular flushing helps prevent issues. For more advanced water heater issues, professional help is recommended.
10. Maintaining Outdoor Plumbing Systems
Key steps for outdoor plumbing maintenance:
- Winterize (Essential in Freezing Areas): Disconnect garden hoses. Shut off the inside water supply valve to outdoor faucets. Drain outdoor faucets. Blow out irrigation systems professionally.
- Check for Leaks: Regularly inspect outdoor faucets, irrigation heads, and visible pipes for drips or wet spots. Look for signs of leaks around the house foundation.
- Maintain Outdoor Drains: Keep storm drains and yard drains clear of debris to prevent pooling.
- Inspect Exposed Pipes: Check visible outdoor pipes for damage (corrosion, cracks). Ensure they are secured.
- Address Vegetation: Be aware of tree roots near buried lines, which can cause damage.
- Spring Startup: Slowly turn water back on in spring, checking for leaks after freezing.
Taking care of your outdoor plumbing can reduce water waste and extend the life of your overall plumbing system.
When to Call A Pro
These ten powerful DIY plumbing tips provide accessible, cost-effective solutions for routine household issues—from unclogging drains and fixing leaks to silencing noisy pipes and maintaining water pressure. Each tip is designed to empower you to tackle minor repairs with confidence while highlighting the importance of knowing your limits.
For more complex problems—such as significant leaks, advanced water heater issues, or water damage—professional help is strongly advised. In Southern Indiana, Hydromax Plumbing Services offers expert repair services, including 24/7 Plumbing Services for emergencies.
Ready to learn more or schedule an appointment? Contact us or discover more about our team of licensed professionals on our About page. With reliable DIY strategies and professional support when needed, you’ll keep your home’s plumbing in top shape for years to come.