Buying a home is an exciting milestone, however, don’t be fooled by cosmetic upgrades alone. Conducting a thorough home plumbing inspection is critical to ensuring your new home’s safety and long-term functionality. Overlooking potential problems can lead to costly repairs down the line. This guide presents 50 essential tips to help you quickly assess a home’s plumbing—from water supply and drainage to appliances and hidden leaks—so you can negotiate repairs or plan updates with confidence.
By following these steps and being mindful of plumbing red flags, you can better protect your investment. Whether you’re evaluating small bungalows or large estates, it pays to understand how modern systems like trenchless pipe repair solutions and pipe bursting services can save money and time. Keep these tips handy when touring homes, and consider consulting an expert if anything appears amiss.
General Plumbing and Water Supply
Ensuring the water supply system is in good shape is the first step in a comprehensive inspection.
1. Test for Consistent Water Pressure
Run faucets throughout the home. Consistent, strong water flow indicates a healthy system, while erratic pressure may signal buildup or leaks.
2. Examine Pipes for Leaks or Corrosion
Inspect visible pipes in basements, crawl spaces, and utility areas for water stains, drips, or corrosion. Older plumbing materials may present health risks, so confirm pipe composition according to the CDC.
3. Locate and Test the Main Shut-Off Valve
Ensure the main shut-off valve works smoothly. A sticking or rusted valve may need replacing in order to quickly stop water flow in an emergency.
4. Check for Hidden Leaks via the Water Meter
Turn off all water and monitor the meter. Any movement suggests a hidden leak. Unaddressed leaks can waste water and significantly increase bills.
5. Inspect Any Water Filtration or Softening Systems
Ensure filters, tanks, and softeners are leak-free and show no signs of wear. Poorly maintained systems can affect water quality and cause damage.
6. Observe the Water’s Appearance
Run water from several taps. Discoloration or sediment may indicate rust, buildup, or contamination that calls for professional evaluation.
7. Verify Pipe Materials
Determine if pipes are made of modern materials like copper or PEX. Outdated galvanized or lead pipes can lead to corrosion or health concerns.
8. Check for Proper Pipe Insulation
Ensure exposed pipes—especially in basements or crawl spaces—are insulated against freezing temperatures to prevent burst lines during winter.
9. Listen for Unusual Noises
Hissing, banging, or whistling can point to air in the pipes or loose connections that compromise water pressure.
10. Look for Signs of Mineral Buildup
White deposits on fixtures suggest hard water, which can reduce system efficiency and shorten the lifespan of appliances.
Kitchen Plumbing Checks
The kitchen places high demands on a home’s plumbing. A brief check can reveal issues before they become more serious.
11. Test Sink Faucets and Sprayers
Run hot and cold water to check for steady flow and consistent temperature. Inspect for leaks around moving parts, and consider residential plumbing services if you see major signs of wear.
12. Inspect Under-Sink Plumbing
Check the cabinet area for water stains, dampness, or mold that signal leaks or condensation issues. These hidden problems can lead to expensive replacements.
13. Assess Garbage Disposal Performance
Operate the disposal and listen for unusual sounds that may indicate dull blades, blockages, or improper installation.
14. Check Dishwasher Supply and Drain Lines
Examine hoses and connections for leaks or loose fittings. Run the dishwasher to spot any operational issues that might need drain cleaning assistance.
15. Look for Slow or Clogged Sink Drains
Observe water drainage; slow flow can mean partial blockages from grease or food debris. Prompt cleaning or repairs reduce long-term damage.
Bathroom Plumbing Considerations
Bathrooms face frequent use, making it vital to stay ahead of any leaks or functional concerns.
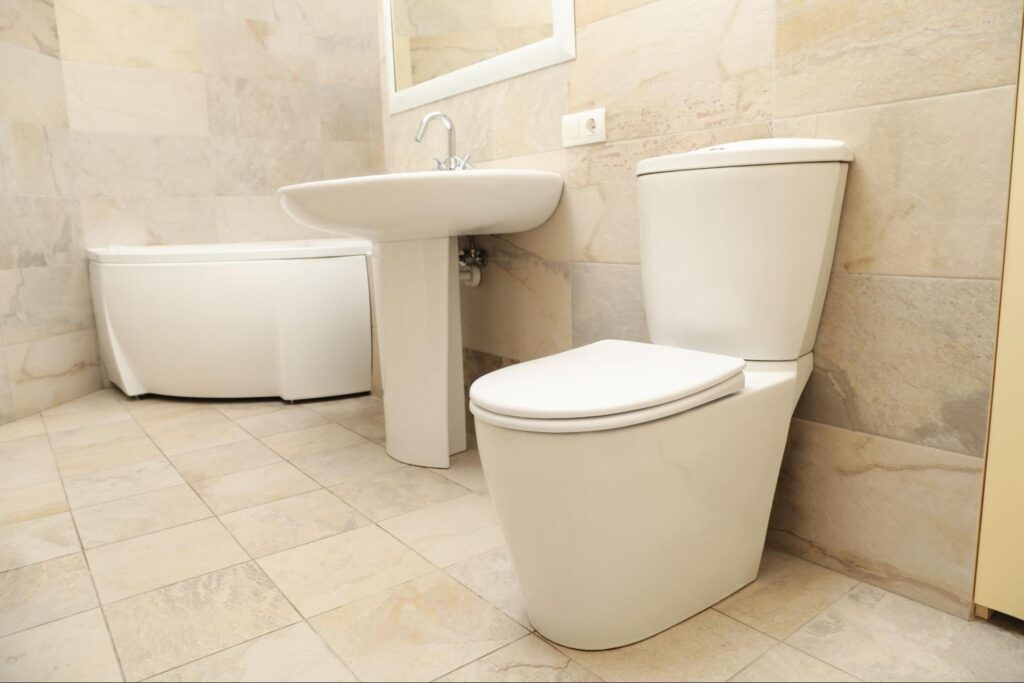
16. Check Toilets for Leaks and Flushing Issues
Inspect inside the tank for continuous running due to worn parts like the flapper. Also, flush the toilet to check for a strong, complete flush, as a slow drain can signal an early clog.
17. Inspect Sinks, Tubs, and Showers for Damage
Look for cracks or chips on surfaces. Harmless-looking faults can worsen and lead to hidden leaks or mold.
18. Test Drainage Efficiency
Run water in all bathroom fixtures. Slow drainage or backups often require plumbing experts to remove deep blockages.
19. Evaluate Showerhead Pressure and Spray
Ensure the shower delivers consistent pressure with an even spray. Mineral buildup can diminish flow, calling for a cleaning or replacement showerhead.
20. Inspect Caulking and Grout
Check seals around tubs and showers. Damaged caulk or grout can let water seep into walls, risking rot, mold, and higher repair costs.
21. Look for Leaks Beneath Vanities
Open cabinets under sinks for signs of moisture that might indicate leaks damaging cabinetry or flooring.
22. Check Around Toilets for Water Damage
Inspect floors for discoloration or damp areas near toilets. A failed wax ring can cause major damage if ignored.
23. Test Bathtub/Shower Diverters
Switch between tub and shower modes. Poor transitions or persistent drips can waste water and raise utility costs.
24. Listen for Abnormal Toilet Noises
Persistent running or gurgling may signal internal tank issues or a venting problem needing prompt correction.
25. Check for Rust Stains
Brownish stains in fixtures point to rust in the water supply or corroded components in immediate need of attention.
Drainage and Sewer System
Proper drainage keeps your home sanitary and helps prevent serious water damage.
26. Test All Drains
Run water through sinks, tubs, and showers. Smooth, quick drainage is ideal, while bubbling or pooling calls for professional help.
27. Look for Signs of Sewage Backups
Unusual odors or gurgling in toilets and drains may signal a clog or compromised sewer line. Some issues can be solved through trenchless pipe repair solutions.
28. Inspect the Yard for Water or Odors
Pooling water or foul smells near the foundation can indicate sewer line leaks or breaks. Early detection saves major excavation costs.
29. Examine Drain or Sewer Cleanout Points
Confirm that cleanouts are accessible and undamaged, ensuring easy access for pipe bursting services or other advanced repairs, if necessary.
30. Consider Professional Video Inspection
A camera inspection provides clarity on the condition of underground lines, spotting blockages or infiltration from roots.
Water Heater and Boiler Concerns
Hot water is essential, and issues in this area can disrupt daily life.
31. Assess the Age and Condition
Check the label for the manufacture date. Units nearing 10–15 years often need replacement soon.
32. Inspect for Leaks or Corrosion
Examine the heater and connections for water pooling or mineral deposits. Consistent maintenance helps mitigate water heater issues.
33. Ensure Sufficient Hot Water Output
Test multiple fixtures to see if hot water stays consistent. Fluctuations might suggest sediment buildup or a failing heating element.
34. Verify Energy Efficiency
Review available energy ratings or certifications. Older models can waste energy and drive up utility costs over time.
35. Ask for Maintenance Records
Regularly serviced units are less likely to fail unexpectedly. Request service logs from sellers during negotiations.
Gas and Heating System Plumbing Checks
When dealing with gas, safety must always take priority.
36. Inspect Gas Lines for Damage
Check for corrosion, loose joints, or kinks in visible lines. According to the NFPA, any sign of deterioration should be addressed immediately.
37. Check Gas Connections on Appliances
Ensure each joint on gas-powered appliances is snug, with no smell of gas present.
38. Evaluate Radiant Floor Heating (If Present)
Look for uneven heating or moisture that may indicate a leak in an in-floor system.
39. Detect Gas Leaks by Smell or Appearance
Be vigilant for a sulfur-like odor or corroded valves requiring immediate attention. If you suspect a gas leak, evacuate the premises and call emergency services.
40. Confirm Proper Ventilation
Vents for combustion systems must be clear and functional. Poor ventilation can lead to carbon monoxide buildup.
Exterior Plumbing and Outdoor Considerations

Outdoor systems protect your property against the elements and maintain structural integrity.
41. Inspect Outdoor Faucets and Hose Bibs
Test faucets for proper flow and check for leaks. Freezing weather can exacerbate any minor cracks.
42. Evaluate Gutters and Downspouts
Ensure they’re free of debris and direct water away from the foundation to prevent seepage into the basement.
43. Look for Pooled Water Near the Foundation
Check for standing water that might undermine the foundation or signal poor grading.
44. Examine Underground Pipes for Warning Signs
Keep an eye out for noticeably damp ground or extra-green lawn patches that suggest hidden leaks.
45. Inspect Yard Irrigation Systems
Confirm sprinklers and drip lines aren’t leaking. Even minor issues can inflate water bills over time.
46. Test Outdoor Sump Pumps and Trench Drains
Confirm outdoor water management systems are free of debris and activate properly during wet weather.
Basement and Crawl Space Plumbing Inspection
Basements and crawl spaces often hide problems that may lead to structural damage.
47. Look for Standing Water or Moisture
Check for damp spots or puddles that can indicate plumbing leaks or poor drainage.
48. Test the Sump Pump in the Basement
Pour water into the sump pit to ensure it activates and removes water efficiently. Industrial plumbing services can help if you notice advanced sump pump issues.
49. Examine Pipes for Wear or Freezing Damage
Look for rust or signs of freezing in cold climates. Swift repairs help avoid catastrophic bursts.
50. Inspect Foundation Walls for Water Stains or Cracks
Discoloration or cracks may signal infiltration from damaged plumbing or poor exterior drainage. If left unchecked, these issues grow increasingly expensive.
Advanced Inspection Techniques and Diagnostic Tools
For those looking to go beyond a basic check, advanced diagnostics can help uncover hidden problems. This level of detail is especially valuable when purchasing higher-value or older properties that may need significant upgrades.
Thermal Imaging and Leak Detection
Thermal imaging cameras reveal temperature variations, pinpointing hidden leaks or poorly insulated sections in walls and floors.
Video Camera Inspections
Video inspections offer an inside look at drains and sewer lines. They can spot obstructions, root intrusion, or corrosion. For major municipal work, consider municipal plumbing services.
Water Pressure Gauges and Flow Meters
Using pressure gauges and flow meters allows you to analyze performance under load. Sudden pressure drops with multiple fixtures running may indicate blockages or subpar pipe conditions.
Acoustic Leak Detection
Acoustic devices pick up water escaping from pipes. They’re ideal for locating slow, stealthy leaks. Combining acoustic detection with thermal imaging can uncover many hidden concerns.
Benefits of Regular Maintenance and Professional Consultation
Regular upkeep is crucial for any home’s plumbing system. Simple checks, like periodically cleaning faucet aerators or monitoring water bills for sudden spikes, can detect problems early and reduce expensive damage. Scheduling periodic service with experts—such as those offering commercial plumbing services—can uncover issues before they escalate.
Professional consultations provide in-depth diagnostics. An experienced technician can highlight improvements or replacements needed and often suggest cost-effective strategies like trenchless pipe repair or tankless water heaters. Comprehensive evaluations can also give you bargaining power when finalizing a property transaction.
Practical Steps for Ongoing Plumbing Care
Even after you’ve settled into your new home, maintain a routine schedule of checkups. Document any odd noises, drips, or unexpected changes in water pressure. Bringing these observations to a professional’s attention during annual service visits ensures that your plumbing system remains reliable, safe, and efficient. By taking a proactive approach, homeowners typically minimize repair bills while preserving home value.
Protect Your Investment: The Final Verdict
A thorough home plumbing inspection can protect you from unforeseen repair costs and ensure a safe, functional residence. By following these 50 tips—from testing water pressure to checking for hidden basement leaks—and utilizing modern diagnostic tools, you’ll be well-prepared to spot potential issues before signing on the dotted line.
If you’re purchasing a home in Evansville and need plumbing assistance, take control of your prospective home’s future by contacting Hydromax Plumbing and schedule a detailed plumbing inspection today. Our local team specializes in everything from advanced pipe lining solutions to tankless water heaters and beyond. A little diligence now can save you considerable stress—and expense—in the long run.