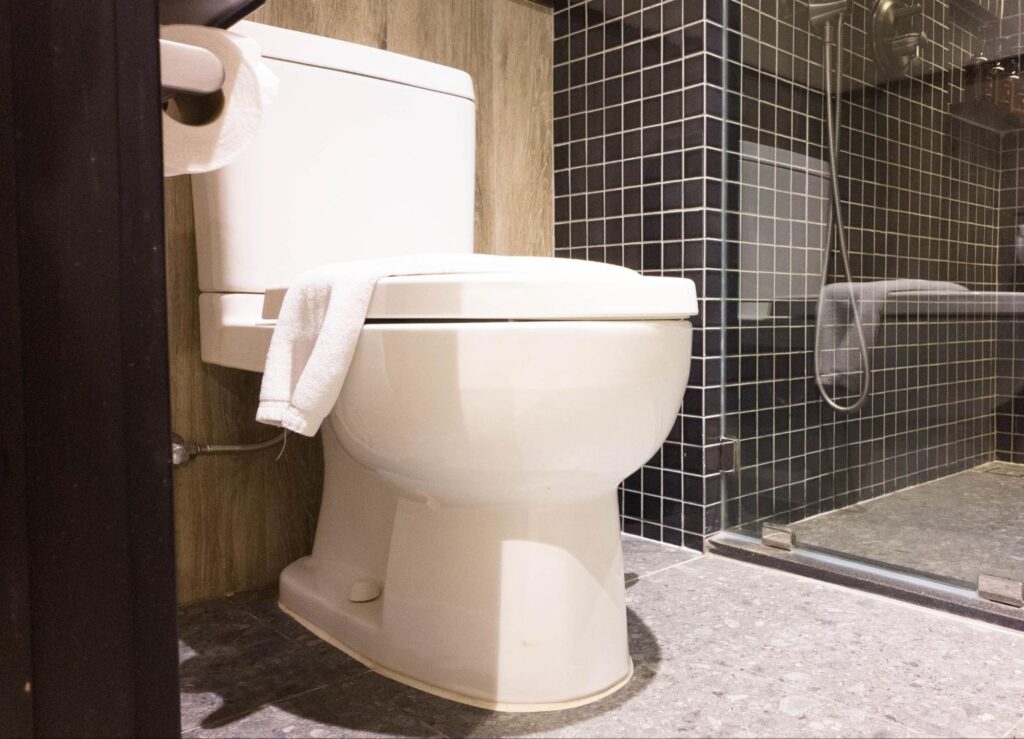
A toilet leak is more than just an annoyance—it’s a waste of water and money that can lead to serious damage if ignored. That persistent running sound or a puddle at the base of your toilet is a sign that it’s time to take action. The good news? Most common toilet leaks are simple and inexpensive to fix yourself.
This guide will walk you through how to quickly diagnose the problem, perform the step-by-step repairs, and know when it’s time to call a professional. For homeowners in the Evansville, Indiana area, the experts at Hydromax Plumbing are always here to help.
Diagnosing Your Toilet Leak: A Quick Checklist
Not all leaks are obvious. Use this checklist to identify the source of the leak and understand its common causes.
Running Water into the Bowl
- What to look for: Hissing sounds, continuous dripping, or “phantom flushes” where the toilet refills on its own.
- Quick Test: Add a few drops of food coloring to the toilet tank and wait 15-20 minutes without flushing. If the color appears in the bowl, you have a leak.
- Common Causes: A worn or warped flapper, mineral buildup on the flush valve, or a misadjusted refill tube. Watch for what some call phantom flushes and listen for hissing sounds.
Water Pooling Around the Base
- What to look for: Puddles of water near the toilet base, which may be accompanied by a musty or sewer gas odor.
- Quick Test: Gently rock the toilet. If the movement causes more water to seep out from the base, the seal is likely the problem.
- Common Causes: A failing wax ring, loose closet bolts securing the toilet to the floor, or an uneven flange.
Drips from the Tank or Tank-to-Bowl Connection
- What to look for: Damp spots or drips on the floor directly beneath the tank or around the bolts connecting the tank to the bowl.
- Quick Test: Thoroughly dry the exterior of the tank and the connection points. Flush the toilet and watch closely to see if moisture reappears.
- Common Causes: Deteriorated rubber washers on the tank bolts or a compressed spud gasket that seals the tank-to-bowl connection.
Leaks Around the Supply Line or Shutoff Valve
- What to look for: Small drips or persistent moisture on the supply line (the hose connecting the wall to the toilet) or the shutoff valve.
- Quick Test: Wrap a dry paper towel around the supply line connections. If it becomes damp, you have a leak.
- Common Causes: Loose compression fittings or a worn-out supply hose washer.
Moisture on the Tank Exterior (Condensation)
- What to look for: A uniform layer of moisture covering the outside of the tank, similar to a cold glass on a summer day.
- Quick Test: Condensation appears evenly across the surface and doesn’t typically form puddles on the floor. A true leak will usually drip from a specific point.
- Common Causes: This is not a leak, but rather condensation caused by a cold tank in a humid environment.
Safety Tip
If you notice significant water pooling, shut off the toilet’s water supply immediately. The shutoff valve is typically located behind or beside the toilet. If you cannot stop the flow, turn off your home’s main water supply.
Anatomy of a Toilet: Key Components
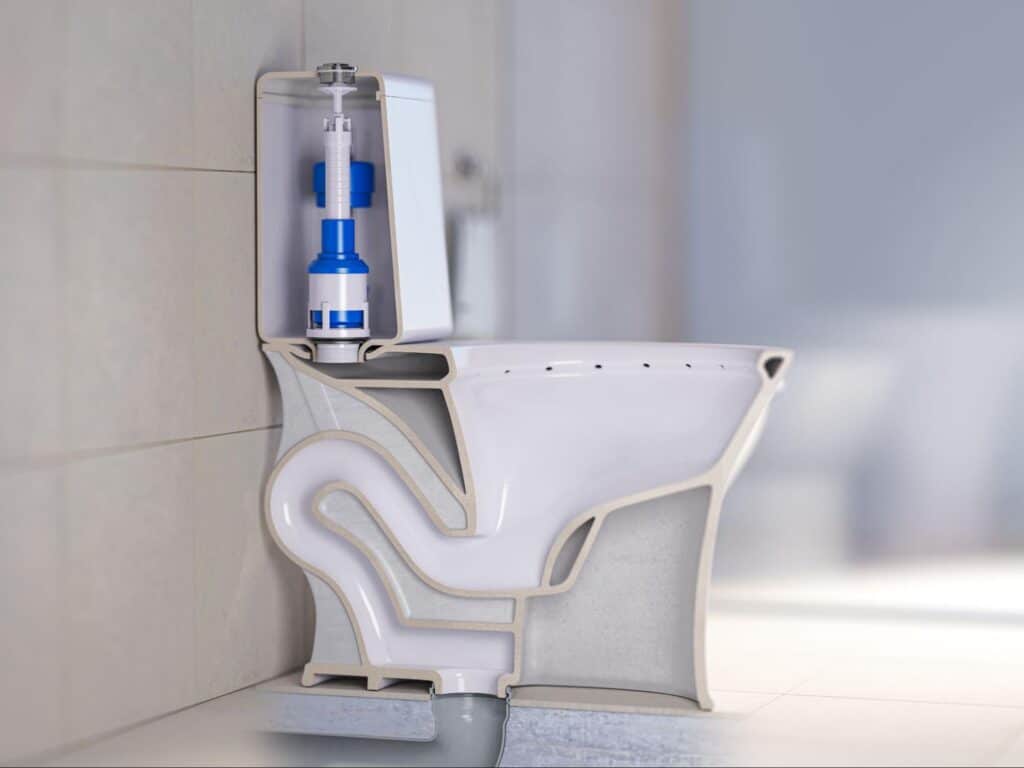
Understanding your toilet’s main parts is crucial for diagnosing leaks:
- Tank: Holds water for flushing and houses the fill valve, flush valve, and flapper.
- Bowl: Receives the flush water and directs waste into the drain.
- Flapper: A rubber seal covering the flush valve; it controls water release.
- Fill Valve: Regulates water refilling after a flush.
- Flush Valve Seat: The surface where the flapper seals; cracks can lead to leaks.
- Wax Ring: Seals the connection between the toilet base and the drain flange.
- Closet Bolts: Secure the toilet to the floor.
- Supply Line and Shutoff Valve: Deliver water to the tank and allow you to stop the flow during repairs.
Tools, Materials, and Preparation for DIY Repairs
Having the right items on hand can simplify your repair process:
- Tools: Adjustable wrench, pliers, screwdrivers, putty knife, sponge, towels, and shims.
- Materials: Replacement flapper, fill valve kits, wax ring, new closet bolts, tank bolt washers, and a braided supply line.
Preparation Steps
- Shut off the water supply.
- Fully drain the toilet by flushing and using a sponge if necessary.
- Lay down towels or a tarp to protect the area.
- Review a diagram of your toilet’s configuration if needed.
Step-by-Step Repairs for Common Leaks
Below are straightforward repair processes for typical toilet leak issues. Always turn off the water supply before beginning any repair.
1. Fixing a Running Toilet
Common Issue: The flapper no longer seals properly
- Tools/Parts: Replacement flapper, adjustable wrench, sponge.
- Process:
- Turn off the water supply and flush to empty the tank.
- Remove the old flapper and clean the flush valve seat.
- Install the new flapper and adjust the chain to allow slight slack.
- Adjust the fill valve as needed so that the water level remains just below the overflow tube.
- Turn the water back on and test for proper sealing.
2. Repairing a Leak at the Base
Common Issue: A worn wax ring
- Tools/Parts: New wax ring (or waxless alternative), new closet bolts, adjustable wrench, putty knife, shims.
- Process:
- Shut off the water and flush to empty the bowl; disconnect the supply line.
- Remove the toilet by loosening the closet bolts.
- Scrape the old wax from both the toilet base and drain flange.
- Position the new wax ring on the flange.
- Carefully reset the toilet, realign the bolts, and tighten evenly (using shims if necessary).
- Reconnect the supply line and flush to check for leaks.
3. Fixing Leaks at the Tank-to-Bowl Connection
Common Issue: Deteriorated washers or a failing gasket
- Tools/Parts: Tank bolt replacement kit, new spud gasket, adjustable wrench.
- Process:
- Turn off the water and flush to empty the tank; dry the surrounding area.
- Remove the tank bolts and lift the tank off carefully.
- Replace the old rubber washers and spud gasket with new ones.
- Reassemble the tank, tightening bolts in an alternating pattern to prevent cracking.
- Turn the water back on and flush to check for remaining drips.
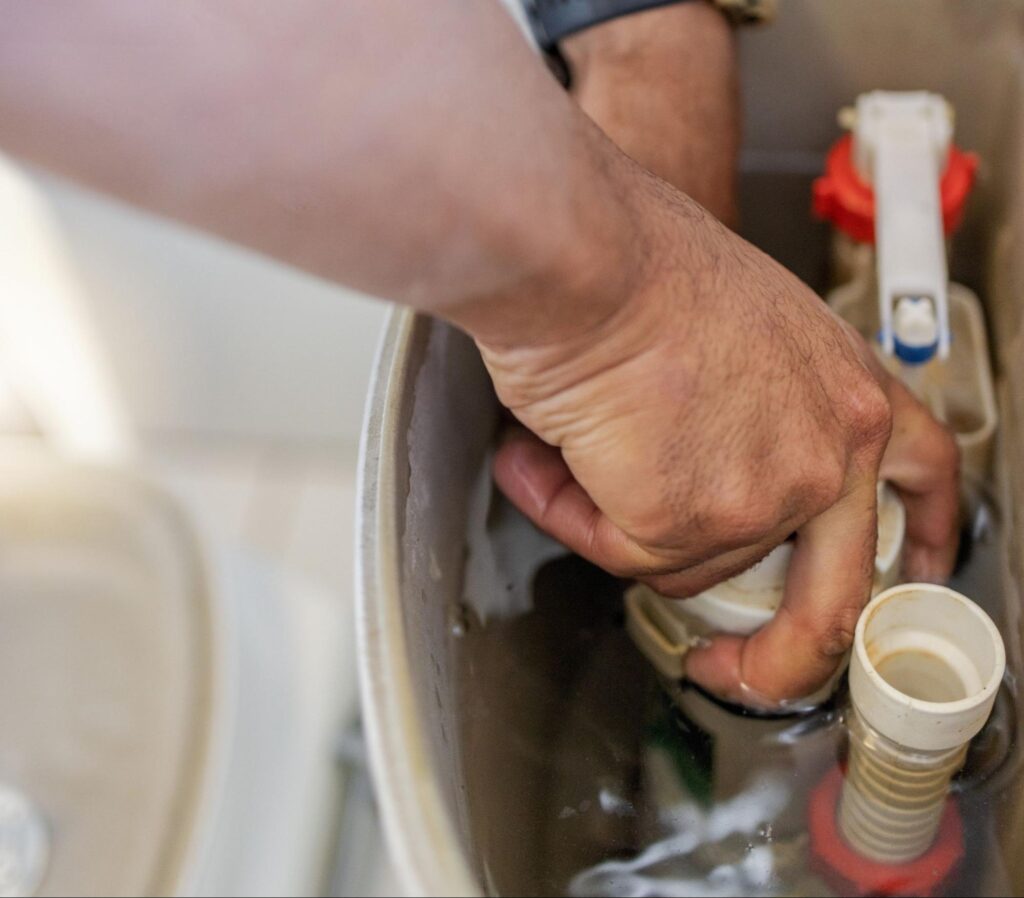
4. Resolving Leaks Around the Supply Line
Common Issue: Loose fittings or a worn-out supply hose
- Tools/Parts: New braided stainless-steel supply line, adjustable wrench.
- Process:
- Gently tighten the existing connection.
- If leaks persist, turn off the main water supply, remove the old line, and install the new one by hand before giving a final tighten with a wrench.
- Restore the water supply and inspect for leaks.
Costs and Time Estimates for Repairs
A basic understanding of the typical cost and time helps you decide whether to DIY or hire a professional:
- Flapper Replacement: Approximately $5–$20; takes about 15–30 minutes.
- Fill Valve Replacement: Parts may cost around $15–$40; typically a 20–45 minute job.
- Wax Ring Replacement: Around $5–$30; takes about 60–90 minutes.
- Tank-to-Bowl Repair: Approximately $10–$30; takes about 45–90 minutes.
- Supply Line Replacement: Roughly $8–$25; usually completed in 10–40 minutes.
For complex or recurring leaks, professional interventions can range from about $150 to more than $600, depending on the severity of the problem.
When to Repair vs. Replace the Toilet
- Repair if:
- The issue is isolated, such as a worn flapper or a loose bolt.
- The toilet is under 15 years old and still operates efficiently.
- The repair cost is minimal relative to replacement expenses.
- Replace if:
- The fixture suffers from frequent leaks or multiple cracks.
- It is an older model with significant water inefficiencies.
- Repeated repairs have become more costly than investing in a new toilet.
Upgrading to a newer, water-efficient model can reduce long-term water usage and lower utility bills.
When to Call a Professional Plumber
While many toilet leaks are simple DIY fixes, some problems require an expert to prevent costly water damage or cracked porcelain. It’s time to call a professional if:
- The leak continues after you’ve tried the common repairs.
- The toilet is wobbly, unstable, or you notice a sewer gas odor.
- You suspect the water damage has spread to the subfloor.
- The shutoff valve is stuck or leaking, or you’re simply not comfortable completing the repair yourself.
For homeowners in the Evansville, Indiana area, Hydromax Plumbing offers fast and reliable solutions. Our expert plumbers are available 24/7 for emergency calls to handle everything from complex leak detection to complete toilet repairs and installations. Don’t let a persistent leak damage your home—contact us for professional help you can trust.
Preventative Maintenance Tips
Regular maintenance helps avoid unexpected leaks:
- Perform annual inspections of the flapper, fill valve, and tank bolts.
- Avoid in-tank cleaners that may degrade rubber parts.
- Inspect supply lines regularly and replace if signs of wear or corrosion are evident.
- Stabilize wobbly toilets by tightening closet bolts or adding shims.
- Control humidity levels to reduce tank condensation.
- Clean around the base often to catch early signs of leaks.
Safety and Common Mistakes to Avoid
- Avoid Overtightening: Gradually tighten bolts to prevent cracking the porcelain.
- Always Shut Off the Water: Make sure the flow has ceased before starting all repairs.
- Avoid Harsh Chemical Cleaners: They may weaken seals and damage components.
- Dispose of Old Materials Safely: Be sure to discard old wax rings or worn gaskets properly.
Frequently Asked Questions About Toilet Leaks
How much water can a running toilet waste?
A moderately running toilet can waste up to 200 gallons of water every day. A severe leak can waste significantly more, leading to a sudden and expensive spike in your water bill. Addressing it quickly is key to saving money and conserving water.
Can a toilet leak cause serious damage?
Yes. Even a small, slow leak at the base of your toilet can seep into the subfloor, causing wood rot, damaging the ceiling below, and creating a perfect environment for unhealthy mold growth. Never ignore a toilet leak, no matter how minor it seems.
Why is my toilet leaking from the base only when I flush?
This is a classic sign of a failed wax ring. The wax ring is the seal between the toilet and the drainpipe on the floor. When that seal is compromised, water escapes onto the floor every time you flush.
What is a “phantom flush” and what causes it?
A “phantom flush” is when your toilet briefly refills as if it has been flushed, even when no one has touched it. This is caused by a slow leak from the tank into the bowl, most often due to a worn-out or poorly sealing flapper. As the water level in the tank drops, the fill valve is triggered to refill it.
Is it cheaper to repair or replace a leaky toilet?
For simple issues like a bad flapper or a loose supply line (repairs often under $50), it is much cheaper to repair. However, if your toilet is old, inefficient, has porcelain cracks, or requires constant repairs, replacing it with a new, water-efficient model is a better long-term investment.
When should I call a professional plumber for a toilet leak?
If you’ve tried the basic fixes and the leak persists, if you’re not comfortable performing the repair, or if the toilet is wobbly and unstable, it’s time to call a professional. For complex issues or plumbing emergencies in the Evansville, Indiana area, the experts at Hydromax Plumbing are available 24/7 to help.
Achieving a Leak-Free Toilet
A small drip can quickly turn into a major headache, but now you have the knowledge to stop most toilet leaks in their tracks. By understanding how to diagnose the signs, perform the repairs, and conduct regular maintenance, you are taking a crucial step in protecting your home from water damage and high utility bills. The goal is to be proactive, not reactive. A few minutes spent inspecting your toilet each year can save you from a costly emergency down the road.
For persistent or complex leaks, contact Hydromax Plumbing and take action today to safeguard your home from water damage and unnecessary expenses. A leak-free toilet is well within reach.